 My favorite part about reading 80-year-old magazine articles is that the writers get really excited about things that we find commonplace or unnecessary. Take this telephone note pad, for example. Gordon found this project in a June 1936 article called “Working with Plastics.”
The first paragraph talks about the importance of home craftsmen getting to know this “new material,” so they can use it in “building many attractive novelties such as candlesticks, jewel boxes, clock cases, vanity powder sets, bracelets, etc.” The article then walks through the steps to building a telephone note pad so you can record all your important messages and information.
Now, instead of being excited about the possibilities of making things out of plastic, we’re busy swearing when we can’t ever find matching lids for our plastic containers or crying over pictures of sea turtles trapped in plastic soda rings. We also don’t have a home phone, and many of us couldn’t find a pencil to take an analog note if we tried.
At the same time, this project is a lot of fun, and now the pad has been put to good use recording measurements for things in the workshop. So if you want some fun with plastic, give it a try.
Here are the steps:
1. Get some plastic.
Gordon bought a cast acrylic sheet in red and one in white from Amazon. You could get by with one 12″ x 12″ sheet, but we liked the look with two colors. You could use any kind of plastic sheet, you’ll just need to adapt the instructions based on how hot the sheet needs to be to bend.
You’ll also some plastic to make the pencil holder. Gordon just used some leftover plastic from the sheet. The instructions say to use a 4″ length of a 1″ diameter plastic cylinder. You can do either.
2. Cut the pieces.
You’ll need a 12″ x 4″ sheet for the top piece, an 8.75″ x 4″ sheet for the base, and two 5.5″ x 3/8″ separators to create the gap for the paper. Gordon used the table saw and followed the advice that “smooth cuts are produced if the saw is adjusted so that the teeth just barely cut through the material.” This also helps to keep the plastic from melting while cutting. If you still have heat problems, use water to cool it down. Now, Gordon says he would just use the bandsaw and not worry about it.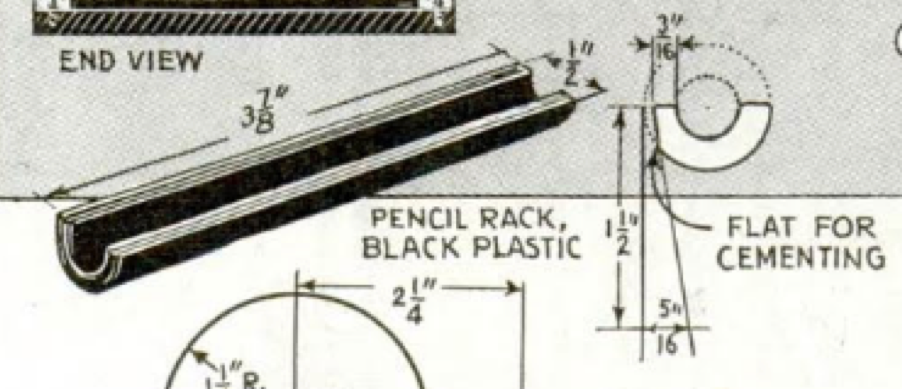
You’ll also need to either cut your plastic cylinder in half lengthwise (see above) for the pencil holder, or cut a piece to mold in a pencil shape.
File all the cut edges so they are smooth.
3. Cut the window
*Disclaimer: you may want to find your paper roll before this step so you can cut the piece to the correct size. We ended up only finding paper rolls that were slightly too wide, so Gordon had to take the whole thing apart and file the hole bigger. Plan ahead, kids. You’ll need to cut a 3.5″ square hole 1/2″ away from one end of the 12″ x 4″ piece. Use a drill and scroll saw to cut the piece out once you’ve measured and marked the hole. File the edges.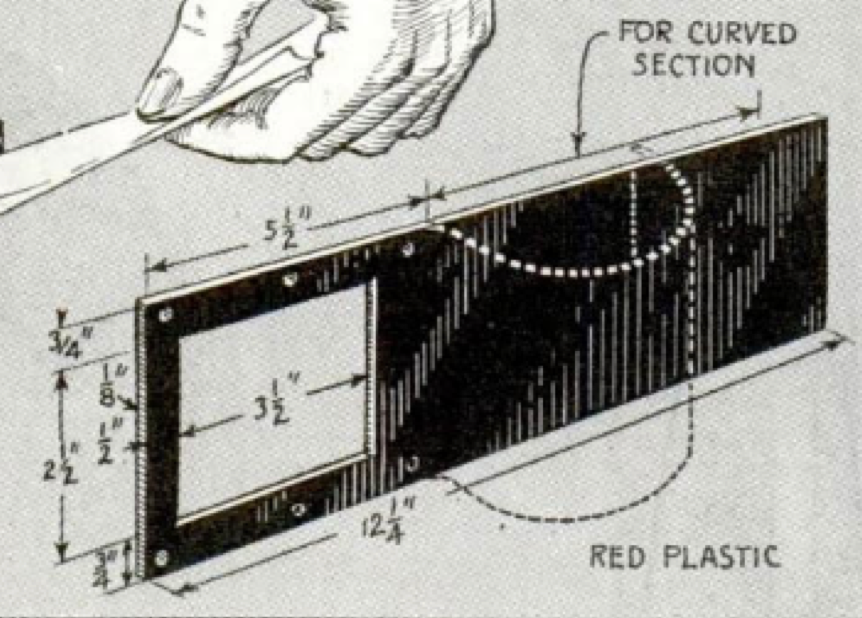
4. Make a template and bend the plastic.
Gordon used wood for the template following these dimensions: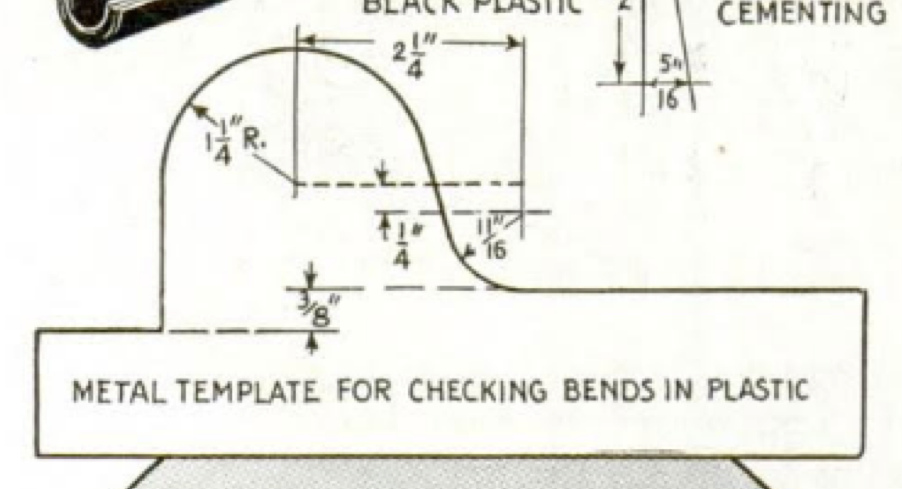
The acrylic was too hard for the suggested method of heating using hot water, so Gordon used a heat gun. When you’re bending the hot plastic, use hot pads or towels to protect your hands (I’m the one in the family who burns myself whenever I’m around hot things, so this is for me. I inherited the trait from my mother, bless her). Make sure the curved top piece fits on the base (8.75″ x 4″).
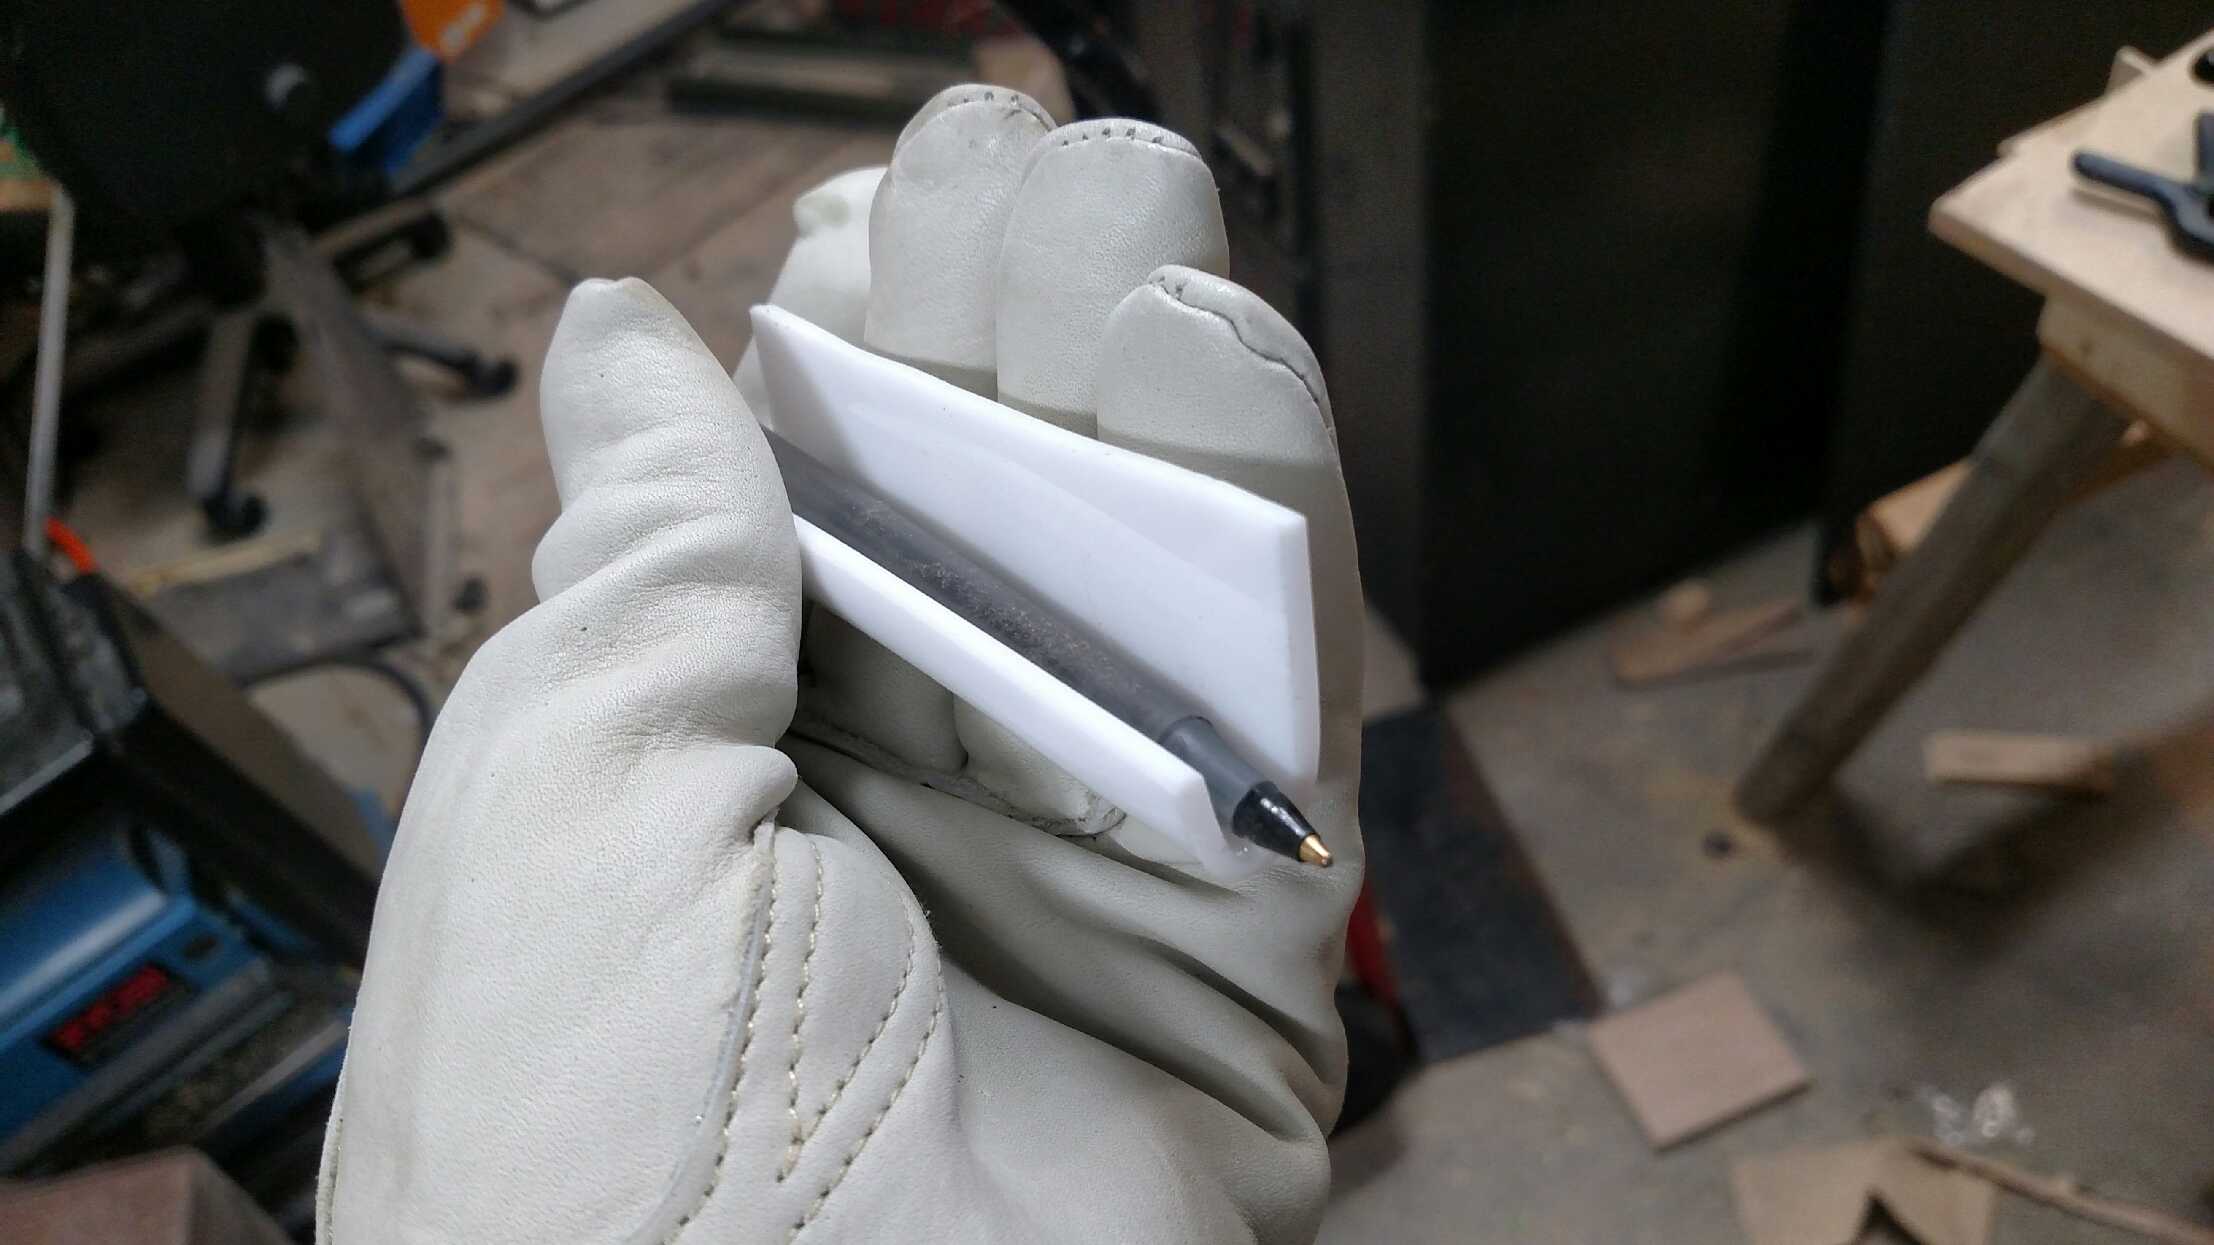
If you are using flat plastic for the pencil holder, find a large pen or pencil and mold the plastic around it to get the right shape.
5. Assemble and Secure
The instructions include screws to hold everything together on the end, but Gordon just used superglue, which worked beautifully. Use the separators to create a space for the paper to come out the end and glue everything to the base.
Then, glue your pencil holder to the front of the curve.
6. Insert your Paper and Pencil
You can find rolls of paper at most office supply stores (see the disclaimer in step 3). Slide it in the cylinder and pull the paper through the end. You can take notes through the window and tear it off the end.
Here’s how Gordon says the project ranks:
Exactness of Instructions: 9.5/10
Not only did they give dimensions for everything, but they also gave you best practices for every step or issue you might encounter. Almost like plastic was a brand new addition to the workshop and people need detailed instructions . . .
I only deviated from the instructions to heat the plastic.
Ease of Build: 7/10
I needed every bit of those three pages of information, because I’ve never done anything with plastic that wasn’t coming out of a 3D printer. Turns out, 80 years of using plastic hasn’t necessarily made the average workshop owner any better at making things out of it. But this project is a great place to start.
Relevance: 5/10
Two words: post-it notes. Build irrelevant. But it was still fun, and we learned some things.
