 We really don’t like to show up empty-handed for parties. This means whoever isn’t driving to the event is usually either juggling a hot pan full of (usually cheesy) food or listening to said pan slide around the back of the car and praying we won’t find a huge mess when we get there. It’s not a perfect system.
Fortunately for us, Popular Mechanics solved this problem forty years ago, and fortunately for me, Gordon likes to peruse forty-year-old issues of Popular Mechanics in his spare time.
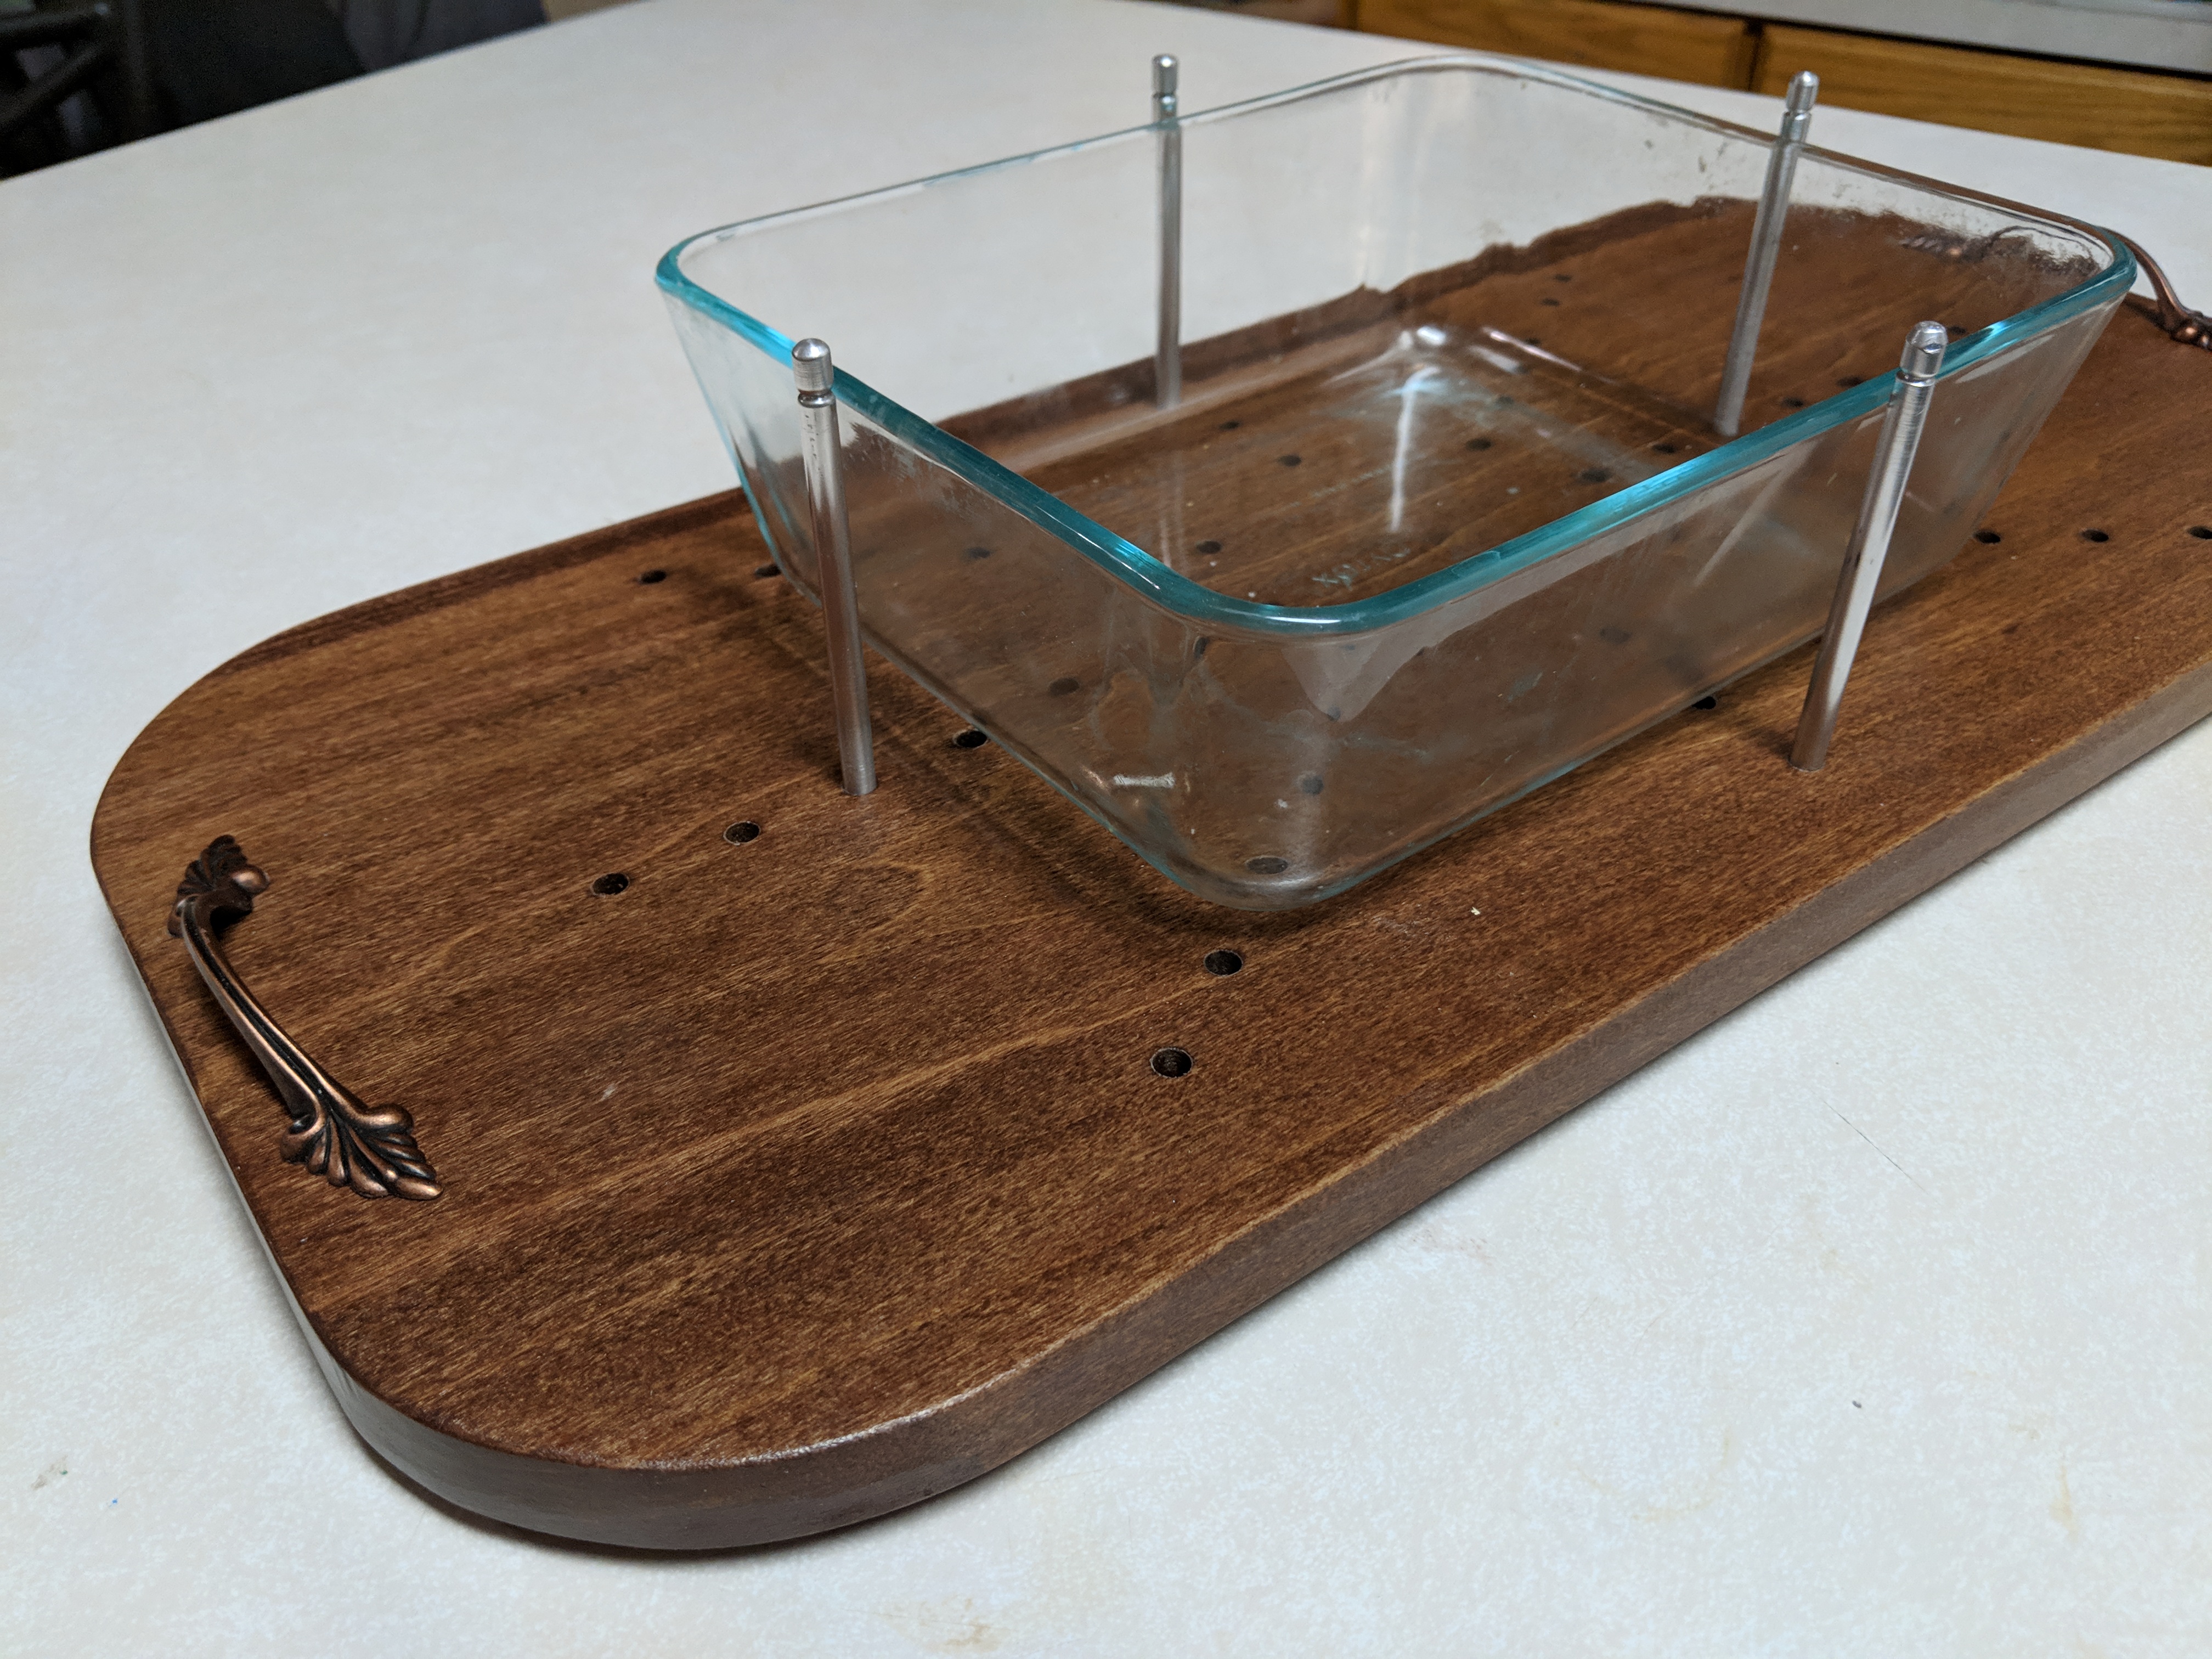
 This casserole carrier means I can hold the dish on my lap without burning myself or worrying it will slide off. And showing up with a handmade platter is a great conversation starter if the party is boring. Also, and perhaps most importantly, it gives you something to do with all those tools in your garage.
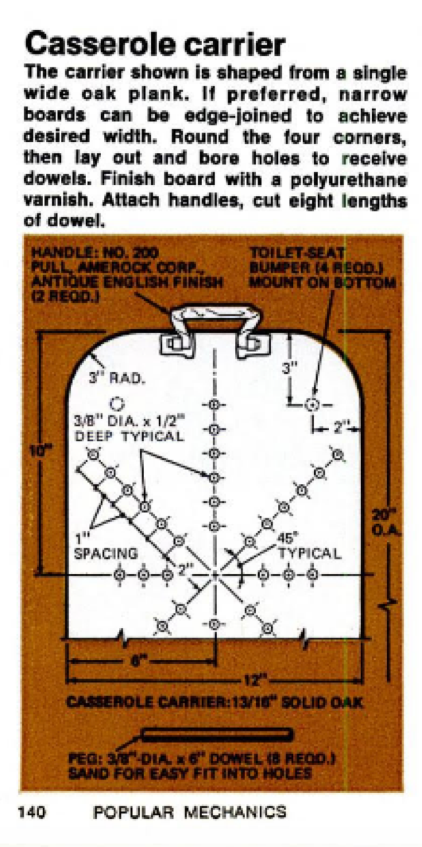
The carrier was part of an article called “19 Great Christmas Gifts You Can Use” in the November 1977 issue. The instructions are pretty sparse (See picture to left. That’s it.), but you don’t need much more.
The carrier itself is really simple to build. You really just need a board big enough to fit your casserole dish (or enough wood glue to make a board big enough), a compass and scroll saw to round the edges, a drill press, sandpaper, stain, varnish, hardware and rubber feet (because it turns out, hardware stores don’t sell toilet seat feet except attached to actual toilet seats, and you don’t really want toilet parts anywhere near your food anyway).
1. Cut the board to the length you want (the suggested 12″ x 20″ should fit most pans, but check your biggest just in case).
2. Use a compass to put a three-inch radius curve on each corner.
3. Use a scroll saw (or jig saw, or coping saw) to cut the corners along the curve.


4. Find the center of the board and draw lines across the length and width. Then, draw diagonal lines. The instructions recommend 45 degree angles, but with the difference in length and width, the diagonal posts would end up much closer to those on the short side than the long side. So Gordon did lines 30 degrees from the long axis instead, and he liked that much better.

5. Mark and drill holes spaced evenly along the lines (according to the instructions). Make them the size of whatever dowels (or in our case, aluminum rod) you’ll be using for posts.These holes do not go all the way through the board. Don’t get carried away. Also drill holes for your handles.

6. Sand the board to round the edges and remove the layout lines.
7. Cut dowels to the height you want. Ours are 4 inches to be taller than our biggest pan. Gordon also used his lathe, a file, and sandpaper to add a notch and round the top of each post, which makes the whole thing classier.


7. Stain and varnish. If you’re using wood dowels, stain and varnish those too.
8. Add handles and rubber feet (if you used a compass to make your corners, use the compass mark to place your feet so they are symmetrical).
So here’s how it stacks up on our made up 1-10 scale of PM projects:
Exactness of Instructions: 9.5/10
The .5 is due to toilet seat feet, because you just can’t get those anymore. Ours is different not because it needed to be, but because Gordon didn’t have the instructions when he went to the hardware store.
Ease of Build: 8/10
Everything is pretty straightforward, and you don’t need specialized skills beyond the basic “I can use power tools without cutting myself.” You can get carried away drilling holes and go all the way through, so keep that in mind.
Relevance: 9/10
The carrier really is just as useful now as it was in the seventies. I only docked it a point because in my mind, we go to less potlucks and make fewer casseroles than people (read: Kitty Forman) in the seventies did, so you may use it less often.
Overall, I think this is one of the most useful PM projects Gordon has made yet. It adapts easily to a variety of pans and is great for transportation.
Anyone have any good casserole recipes? We’d especially like it if they too come from the seventies . . .
